Posts filed under Photography

Long Exposure Photography With 16 Stops ND

A while back I investigated the possibility of using the Lee filter system on my Fujifilm X-T1. As you can see, I invested in two Lee ND filters;

  • Lee Big Stopper (110ND / 10 stops Neutral Density Grey filter)
  • Lee Little Stopper (106ND / 6 stops Neutral Density Grey filter)

The thing with ND filters is that they reduce the light evenly. This results in (depending on the greyness of the filter) longer exposure times. With enough 'stops' in front of your lens, you can stretch the exposure from 1/200s to 10 or 15 minutes. Shooting with exposure times of minutes instead of the usual fraction of seconds results in motion blur in the photos (assuming that you're not shooting a stationary object indoors). Expose long enough, and the movement becomes a silky haze.

Posted on September 29, 2014 and filed under Gear, Photography, Tips'n Tricks.

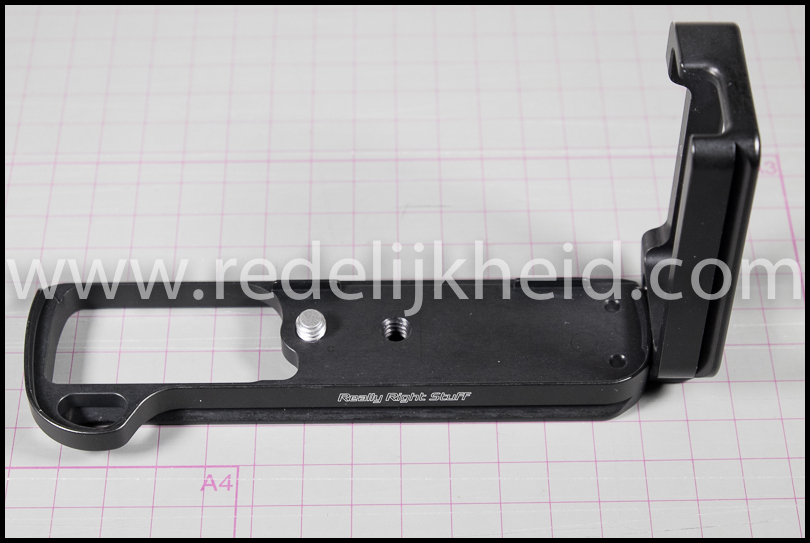
Really Right Stuff L-Plate For Fuji X-T1

The Arca-style tripod heads and plates are one of my favorites. I use them now for over 4 years, and I guess I'll be using them for a long time. Especially the so-called L-plates are awesome.

The L-plates are plates which enables you to put the camera in portrait orientation on the tripod head, without putting the top of the head in an awkward vertical position, which lowers the effective height of your camera on the tripod.

For my former Nikon D300 I had a L-plate by Really Right Stuff, and now that I upgraded to a Fujifilm X-T1, I needed one for that model. This time they (Really Right Stuff - RSS) created a modular L-plate. The former D300 version was made out of one piece, but the this one allows you to remove the L-part of the plate, making the camera lighter. So you need to add that part if you intend to shoot in the portrait orientation. The good thing is that you can order the parts separately. So you can start with the base plate and get the L-part when you need it. I just got them both at the same time.

The entire kit comes with the appropriate hex wrenches and a small screw which can be used on the bottom plate as a stop, so the camera won't accidentally slide out of the ball head. Unfortunately,  there's only one stop screw available on the bottom, so the camera can still slide to the other side.

The connection of the two parts is rock solid. No movement what so ever. I just hope that it doesn't wear over time.

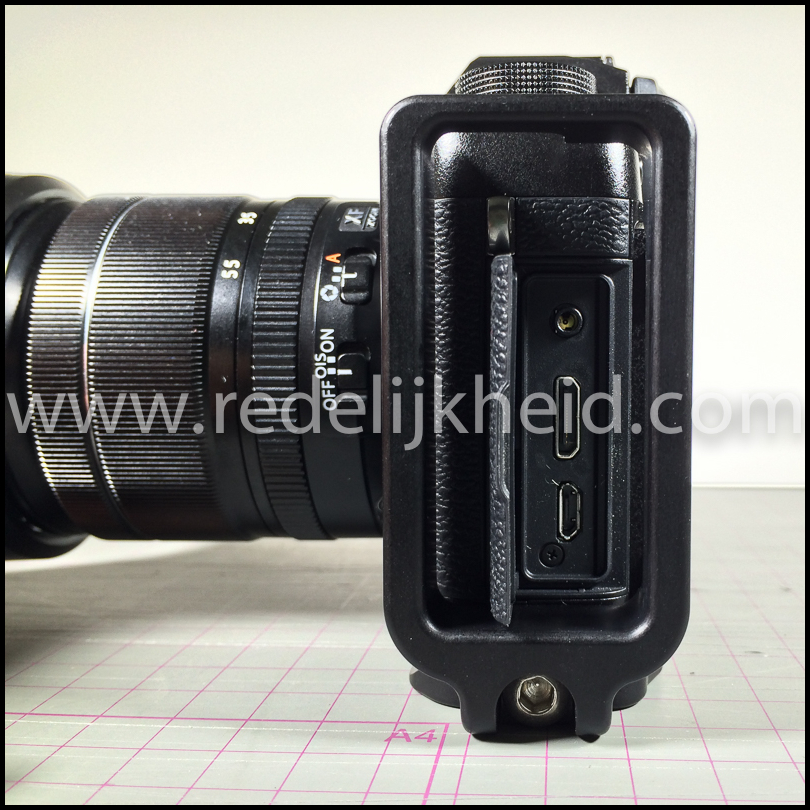
While the L-plate is attached to the camera, you can still access all the important parts of the camera.

There is one downside to the L-plate. You cannot use the Fuji wired shutter remote when you have the l-part attached to the bottom plate. But you can always use the Fuji smartphone app to remotely control your camera via a wireless connection.

Posted on August 1, 2014 and filed under Photography, Gear, Review.

Induro BHL1 Ballhead

A couple of years ago I bought the Arca-Swiss Z1 Monoball (with flip-lock) to support my Nikon D300 with several lenses. An excellent ballhead which would last you a life time (that's what I said at the time). And that statement is still valid, IF I was still shooting with (large) DSLR's. In the mean time I sold my DSLR and went for something a bit more compact with the Fujifilm X-T1.

Scaling down on the camera part means that I can also scale down the accessories. A smaller and lighter camera doesn't need a beast like the Arca-Swiss Z1 Monoball for tripod support. Something smaller and lighter (and cheaper) would also suffice.

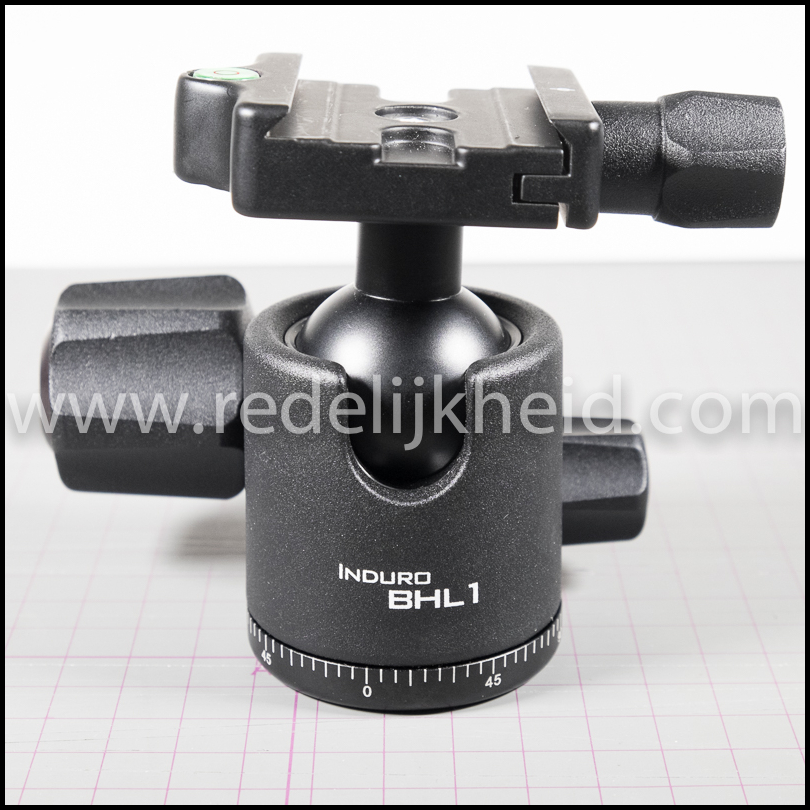
Induro Ballhead BHL1

Looking around on the Internet I ran into the Induro brand. They make tripods, monopods, and (ball)heads. The one I got is their smallerst BHL ballhead (BHL1).

It's relatively small (compared to the Arca), and about 200grams lighter, while it's still capable of bearing a 20kg load. Not that my current gear comes even near that weight.

It also has the main features of the Arca-Swiss Monoball. Nice bog knobs, with variable friction setting. It also comes with a all-round camera plate (PU60), and a nice bubble-level. The latter is kinda small, so I don't know if it's very usable in the field.

I use the included PU60 plate on my Nikon P7000 P&S camera if necessary. The Wimberley P-5 is my preferred plate under my M9. The Fuji X-T1 is using a Really Right Stuff L-Plate (BXT1). I tested the PU60 on my M9, but even with the rubbery pads on the plate, I could still easily rotate the plate under the camera. This doesn't happen when I use the Wimberley P-5 plate.

This shouldn't be a problem in everyday use, but when you want to do some long-exposures, you don't want the camera to move around the plate itself.

The following photos might give you some idea of the ball head with the included PU60 plate.

The tension on the ball is adjustable (by the 'wheel' in the large knob. It allows you to maintain movement of the ball head, but when you let go of the camera, it stays in the position when you let go. The adjustment can be done with the tip of your finger. If that is hard, you can also use a small coin (or screwdriver) to adjust the friction setting.

It also features a locking mechanism that makes sure that you don't accidentally 'loose' the camera when moving around. This might happen when you loosen the plate. One condition is that the plate attached to the camera has 'stop screws' on the bottom. If these are present, you need to pull and turn the release knob. After that you can safely remove the camera from the ball head.

Posted on August 1, 2014 and filed under Gear, Photography, Review.

Stephen Colbert On Amazon's Latest Patent

Amazon patented the practice of photographing objects against a white background... Huh? What the F*ck?

Well, that's exactly what Stephen Colbert thought;

I guess that I'm not the only one violating that patent.

Dandelion seed against a white background

Posted on May 18, 2014 and filed under No Way!!!, Fun, Video, Photography.

Continuous Macro Lighting

When shooting macro, you need a lot of light. Normally you would use one or more (off-camera) flashes to facilitate this. The downside of a flash is that you only get the light when you press the shutter button. This can be challenging a relative low-light environment.

A solution for this is continuous lighting.

The traditional continuous lighting setups would get really hot. A couple of hundred Watts of power was nothing, and, in a small workspace, things could get hot (literally).
Thankfully, we have LED lights nowadays. Small (battery powered) devices with a lot of bright LED's, which are very affordable.

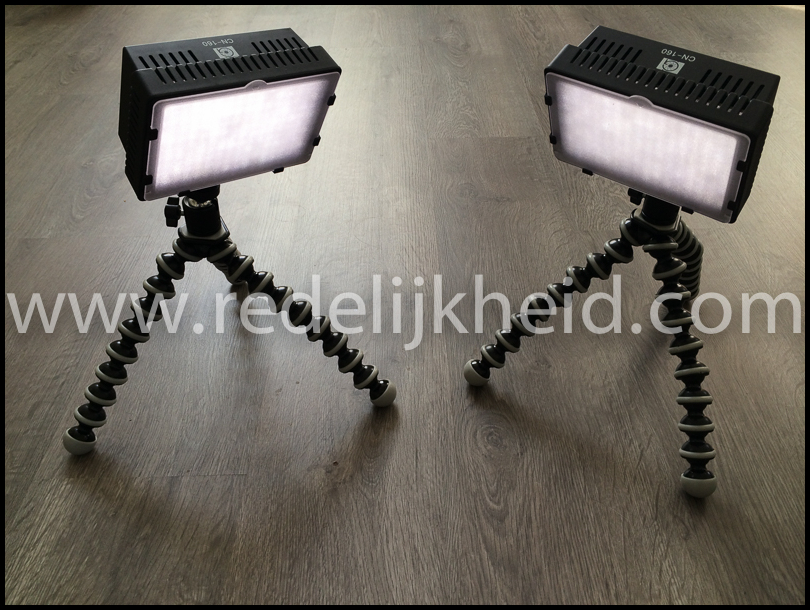
I bought a set of video lights on Amazon with 160 LED's (NanGuang CN-160) each. The devices are battery powered and give a lot of light. The video lights have a dimmer, so you can control the amount of light.

NanGuang CN-160 Video Lights

They take several types of batteries. Including 6 AA-type rechargeable batteries. The problem with the AA batteries is that they drain relatively fast, so I got a set of supported batteries, which normally go into a Sony camcorder (NP-F750F). Not the originals, but a cheaper knock-off. Another advantage of the larger batteries over the AA-types is that the amount of light produced is significant higher, and lasts for a longer period of time.

Batteries not included

The lights itself are relatively light, but with the batteries they tend to weigh around half a kilo each. So this is not a practical setup for handheld macro photography in the field.

To give you an idea of how much light they produce: The following photo was made in a dark room with one of the video lights on full power with the included diffuser. The camera (handheld) / lens settings were:

  • Camera: Fujifilm X-T1
  • Lens: Sigma 105mm F/2.8 Macro DG (F-mount with a X-adapter)
  • Shutter: 1/600
  • Aperture: F/8
  • ISO: 400

All I need right now is to create some sort of a flexible (portable) workspace with a way of positioning the lights independently around the subject.

UPDATE: I received my cheap flexible tripods and (even cheaper) ballheads by mail today. This should make the lighting for my macro photography a bit easier.

The total cost of this setup is around €150 (depending on the currency exchange rate).

Note: The setup is sufficient for the (cheap) LED-lights, but I wouldn't trust them with my Leica or Fuji camera.

Posted on April 25, 2014 and filed under Gear, Hardware, Photography, Tips'n Tricks.

Just Apply Pressure

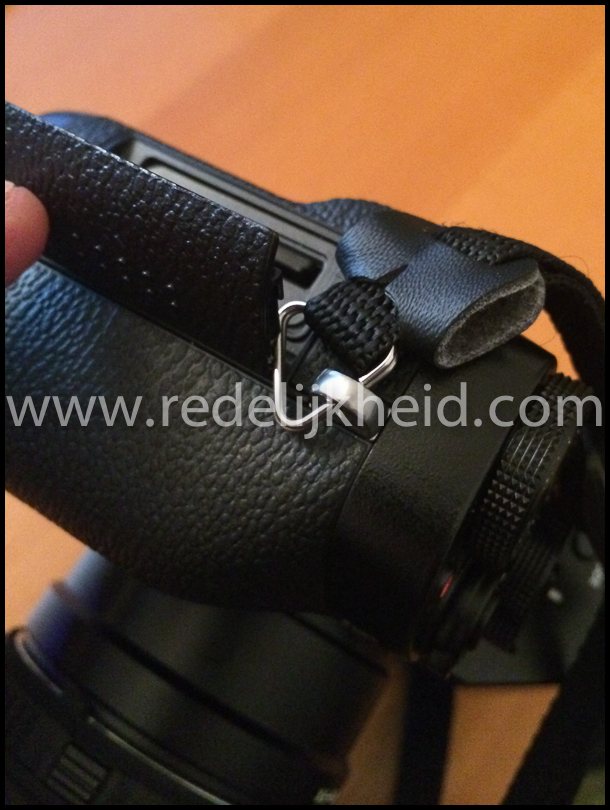
to wreck the SD-card slot cover of the Fujifilm X-T1. An obvious design flaw if you ask me.

Thankfully, I handle my camera with care, but I don't want to think what would happen if I applied a bit more pressure on closing the memory-card compartment.

Posted on April 25, 2014 and filed under Annoying, Gear, Hardware, Photography.