
After installing Python on Windows or MacOS, the installer makes sure that everything works fine. All paths are available/accessible for Python. Adding modules through pip also works just fine.
The problem is that the paths used are hard to remember (e.g. Windows: c:\Users\<username>\AppData\Local\Programs\Python\Python37\), so if you want to use some custom modules you have to use the (complex) default structure, or you can use your own.
Using your own directories for custom modules requires adding the path(s) to the environment variable PYTHONPATH.
Windows
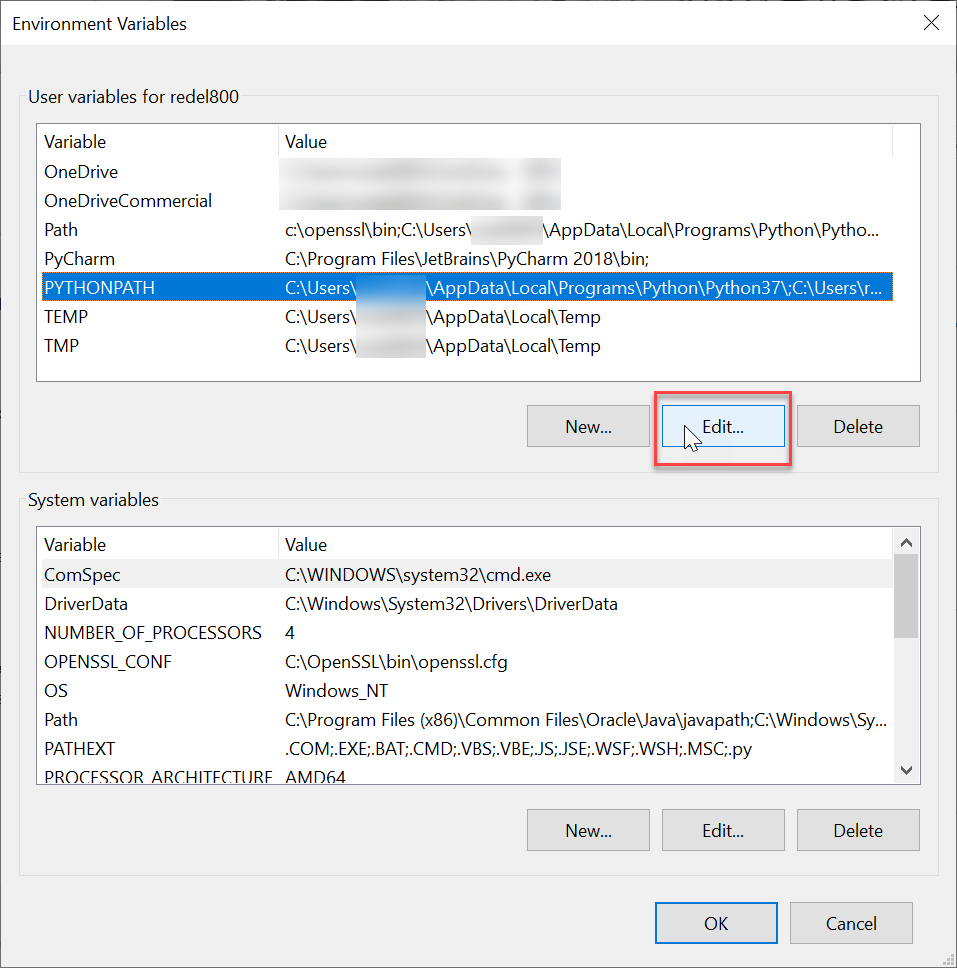
After installing Python, the installer add the PYTHONPATH environment variable to Windows. All you need to do is add your custom path to this variable.
The environment variables can be found through:
This PC -> Properties -> Advanced Settings -> Environment Variables
In screenshots:


MacOS
On my MacOS devices I had to add the path(s) to 2 different files because (regular) GUI based programs (like Pycharm and Python IDLE) use different environment variables than the terminal / console interpreter.
GUI-Based programs
Create a startup plist file (e.g. ~/Library/LaunchAgents/my.startup.plist) and add the following XML content:
<?xml version="1.0" encoding="UTF-8"?>
<!DOCTYPE plist PUBLIC "-//Apple//DTD PLIST 1.0//EN" "http://www.apple.com/DTDs/PropertyList-1.0.dtd">
<plist version="1.0">
<dict>
  <key>Label</key>
  <string>my.startup</string>
  <key>ProgramArguments</key>
  <array>
    <string>sh</string>
    <string>-c</string>
    <string>launchctl setenv PYTHONPATH ~/Python_Scripts/_my_modules</string>
  </array>
  <key>RunAtLoad</key>
  <true/>
</dict>
</plist>
The string ‘~/Python_Scripts/my_modules/’ points to my custom module directory. Edit this to reflect your own directory structure. If you need multiple directories you can add these by seperating them by using a colon (:) e.g.
<?xml version="1.0" encoding="UTF-8"?>
<!DOCTYPE plist PUBLIC "-//Apple//DTD PLIST 1.0//EN" "http://www.apple.com/DTDs/PropertyList-1.0.dtd">
<plist version="1.0">
<dict>
  <key>Label</key>
  <string>my.startup</string>
  <key>ProgramArguments</key>
  <array>
    <string>sh</string>
    <string>-c</string>
    <string>launchctl setenv PYTHONPATH ~/Python_Scripts/_my_modules:~/Desktop/my_scripts</string>
  </array>
  <key>RunAtLoad</key>
  <true/>
</dict>
</plist>
To makes these changes active you can either reboot, log-out/log-in or execute the following command:
launchctl load ~/Library/LaunchAgents/my.startup.plist
Terminal / Console
For the terminal / console based Python interpreter you need to add some lines to the ~/.bash_profile or ~/.zprofile file (depending wether you use bash or zsh as shell).
PYTHONPATH="~/Python_Scripts/_my_modules:$"
export PYTHONPATH
Multiple directories can (again) be added by using the colon seperator (:):
PYTHONPATH="~/Python_Scripts/_my_modules:~/Desktop/my_scripts:$"
export PYTHONPATH
To activate this, just quit the open terminal/console windows (CMD-q) and open it again.